
From what we see every day, the traditional auto glass shop model is changing rapidly. Homeowners and business owners simply do not have the spare time to sit in a waiting room for three hours just to fix a cracked windshield.
The simple fact is that a damaged windshield compromises the structural integrity of your vehicle, making prompt replacement a necessity rather than a luxury.
That demand for convenience and safety explains exactly how mobile windshield replacement works as a modern solution. We will break down the specific steps involved, the tools required, and practical ways you can prepare for a smooth onsite visit.
What “mobile” actually means
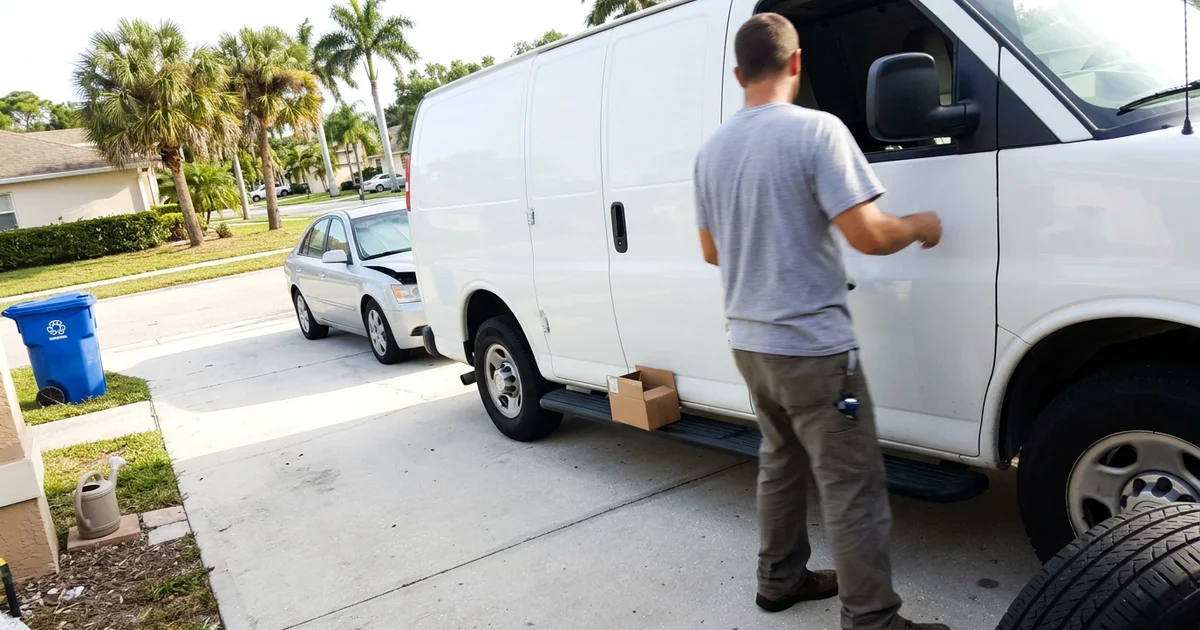
A mobile windshield replacement is exactly the same job a fixed shop does, just performed at your address instead of theirs. Our vans function as complete rolling garages.
Every unit is equipped with the essentials needed for a factory-quality install:
- High-modulus SikaTack urethane and primers.
- Advanced ADAS calibration computer systems.
- A reliable Honda EU2200i portable generator for power.
- Precision glass setting tools.
Nothing gets skipped just because the work happens outdoors. The reason this model thrives in Florida comes down to geography and time.
Our mobile windshield replacement corridor runs straight from Ocala to Naples. Much of that area consists of spread-out suburbs and canal communities.
Finding a physical glass shop in these areas often requires a 40-minute drive each way. Removing that hour and a half of driving is where the true value lies for most customers.
Step 1: Send a photo and your vehicle details
Texting or uploading a picture of the damage alongside your vehicle year, make, model, and trim is the crucial first step. Two important answers come out of that initial message.
We determine whether the damage is repairable or needs replacing, and identify the exact glass part number your car requires. Modern windshields are incredibly complex pieces of technology.
A 2026 Ford F-150, for example, has over a dozen distinct glass configurations depending on the trim package. Your specific vehicle might feature an acoustic interlayer, a heated wiper park, a heads-up display, a rain sensor, a camera bracket, or a humidity sensor.
Getting those details right before dispatching the van prevents a wasted appointment.
Why Vehicle Details Matter
| What You Provide | What It Tells Us |
|---|---|
| Photo of the damage | Determines if the glass can be repaired or requires a full replacement. |
| Vehicle Make & Model | Narrows down the structural fit and base glass dimensions. |
| Specific Trim Level | Identifies required features like a heads-up display or rain sensor. |
Step 2: We verify your coverage
Your insurance coverage dictates the next phase of the mobile windshield replacement process. If you carry comprehensive auto coverage, our team checks the details directly with your carrier and files the claim on your behalf.
The Zero-Deductible Florida Advantage
Florida drivers actually have a massive advantage here. Florida Statute 627.7288 legally prohibits insurance companies from applying a deductible to windshield repairs or replacements under a comprehensive policy.
You find out your out-of-pocket cost, which is usually exactly $0, before anything is scheduled. Our guide on free windshield replacement in Florida explains exactly who that statute covers. If you are paying out of pocket, you receive a firm cash windshield replacement quote at this stage instead of a vague estimate.
We eliminate the financial surprises so you can make a clear decision.
Step 3: Pick a time and a place
Choosing a location is flexible, whether it is a home driveway, an office parking lot, a shaded spot at the marina, or the side of the road if the car is not drivable. This flexible, we come to you windshield service model adapts entirely to your schedule.
Our technicians need a workspace slightly wider than a standard 9-foot parking space, plus room to stand at the front of the hood. A surface that is not badly sloped is also highly recommended for a safe installation.
Rain presents the only real obstacle for outdoor glass work. While advanced adhesives like SikaTack actually use ambient humidity to cure, liquid water and windshield primer do not mix. If a Florida afternoon storm rolls in, we will reschedule rather than rush a compromised installation.
Step 4: The install, start to finish
Here is the actual sequence you will see on site:
- Protect the car: Protective covers go over the dash, hood, and front seats. The rearview mirror, rain sensor, and camera bracket come off carefully.
- Cut the old glass out: A specialized tool like the WRD Spider 4 fiber line system separates the old urethane bead. This heavy-duty fiber string cuts through the glue without scratching the vehicle frame, and the damaged windshield comes out in one piece where possible.
- Prep the pinch weld: Old adhesive is trimmed down to a thin, even base layer. Any bare metal gets primed immediately, because rust under a windshield is what causes massive leaks three years later.
- Prime and bead: Glass primer goes on the frit band, followed by a continuous, correctly shaped urethane bead. Our technicians apply a triangular bead shape rather than a round one, as the triangle compresses perfectly to prevent air gaps.
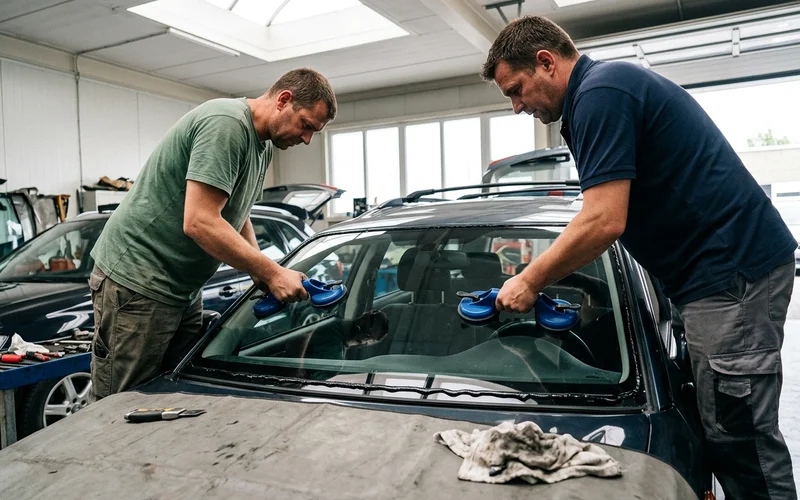
- Set the glass: Two technicians with large suction handles place the windshield in one smooth motion. There are no second attempts once the glass touches the adhesive.
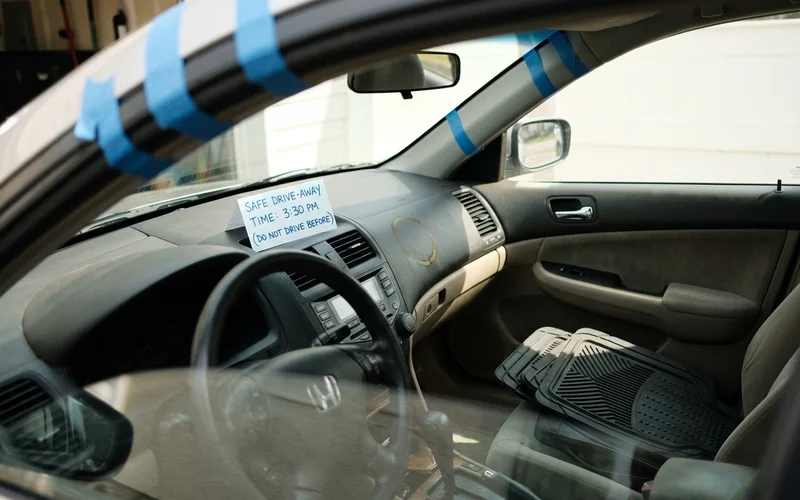
- Reassemble and tape: Mouldings, the cowl, mirrors, and sensors are reattached. Retention tape holds the top edge securely while the adhesive builds initial strength.
Step 5: Calibration, if your vehicle needs it
Over 80 percent of 2026 model vehicles feature a forward-facing camera mounted right behind the glass. If your car falls into this category, the safety systems require exact recalibration before they can be trusted on the highway.
We run this ADAS calibration process during the exact same appointment. Using specialized diagnostic computers like the Autel MaxiSYS or Launch X-431, the camera is re-aligned to factory specifications.
The calibration involves static targets placed around the vehicle, a dynamic road cycle, or a combination of both. You receive a printed or digital pass report confirming the sensors are aimed correctly.
What you need to have ready
Preparing for a mobile windshield replacement requires very little effort on your end. A few simple preparations make the visit go faster and ensure a perfect installation.
Here is what helps the process:
- A parking spot we can work around: A driveway, a carport, or an end space in a lot works perfectly. We need enough room to open both front doors fully and stand at the front of the vehicle.
- A reasonably level surface: Flat ground is important for setting the glass, and it is absolutely essential if your vehicle needs a static ADAS calibration. The camera alignment requires a surface slope of less than two degrees.
- Clear the dash and front seats: Anything loose ends up under a protective cover otherwise.
- The keys, and someone reachable: The technician needs to start the vehicle for calibration and for the post-install dashboard checks.
- Shade if you have it: While not required, a carport or a large tree makes a July appointment in Florida much more pleasant for everyone.
You do not need to move the car, book time off work, or hover over the vehicle for the middle of the job. Most customers simply hand over the keys, go back to their desk, and come outside when the job is finished.
What we’re checking while we’re there
A windshield replacement provides a rare opportunity to catch hidden structural problems you would otherwise never see. With the old glass removed, the technician thoroughly inspects the pinch weld, which is the metal channel the windshield physically bonds to.
Rust in this channel acts as the single biggest cause of severe leaks that appear a year or two after a replacement. If a previous install scratched the factory paint and left bare metal exposed, moisture gets in and slowly works underneath the seal.
Preventing Future Windshield Leaks
Our protocol is to treat and prime any minor bare metal spots before the new adhesive bead goes down. If the corrosion has spread beyond a safe field repair, the technician will show you the damage rather than irresponsibly bonding glass over it.
Ignoring severe pinch weld rust can easily lead to costly auto body repairs down the road. We also check the cowl, the drainage channels, and the physical condition of the rubber mouldings.
These look like small details, but they represent the difference between a windshield that stays quiet for a decade and one that whistles terribly at 70 mph by Christmas.
Step 6: Safe drive-away time
Urethane does not cure instantly, and the most critical metric for your safety is the safe drive-away time. This refers to the exact point at which the adhesive bond is strong enough to hold the glass in place during a passenger airbag deployment, as required by the FMVSS 212 federal safety standard.
With the fast-curing, high-modulus adhesives we use, such as SikaTack Ultimate, that time is typically about 30 to 60 minutes. Florida’s intense heat and humidity actually accelerate this process.
The moisture-curing adhesive hardens faster in a sunny driveway than it would in a dry, climate-controlled northern garage. Your technician writes the exact safe drive-away time on a card and leaves it on the dash.
The 24-Hour Post-Install Checklist
To ensure the cure finishes perfectly over the first day, follow these simple rules:
- Leave the retention tape on: Keep the top tape in place for a full 24 hours.
- Relieve cabin pressure: Crack a side window about an inch when parked in the sun so expanding hot air does not push against the fresh seal.
- Avoid high pressure: Skip the automatic car wash and power washer for at least two days.
Getting it booked
Starting the process is as simple as sending a quick photo from your phone. You get a firm answer on price and parts, and then you pick a time that fits your schedule.
Most customers go from their first text message to greeting a technician in their driveway within 48 hours. Same-day mobile windshield replacement slots also open up regularly across our Florida service corridor.
We make windshield replacement at home a painless, straightforward experience. Send us a message today to get your vehicle safely back on the road.